Painting your front door is a quick and easy update you can do to your home to instantly add curb appeal. Update yours with this tutorial on how to paint a front door for beginners.

Painting your front door is a great way to add some personality to the outside of your home. You can have fun and go with a bold accent color or you can be conservative and stick with a color that will blend in with the rest of the exterior.
Personally, I like to go bold. Your front door is the first thing guests see when they come to your home. You want to make a great first impression and you want it to be welcoming.
When selling your home, it’s your first opportunity to have your home stand out above the rest of the homes on the market.
It shows that the home is well cared for. When the curb appeal looks great, people will want to see what is inside.
When a sweet friend and her husband purchased their first home, I updated their front door entry as a housewarming gift.
My friend hadn’t painted a front door before, so we rolled up our sleeves to tackle her doors. I’ll share with you the simple steps I used to show her how to paint a front door.
How to Paint a Front Door
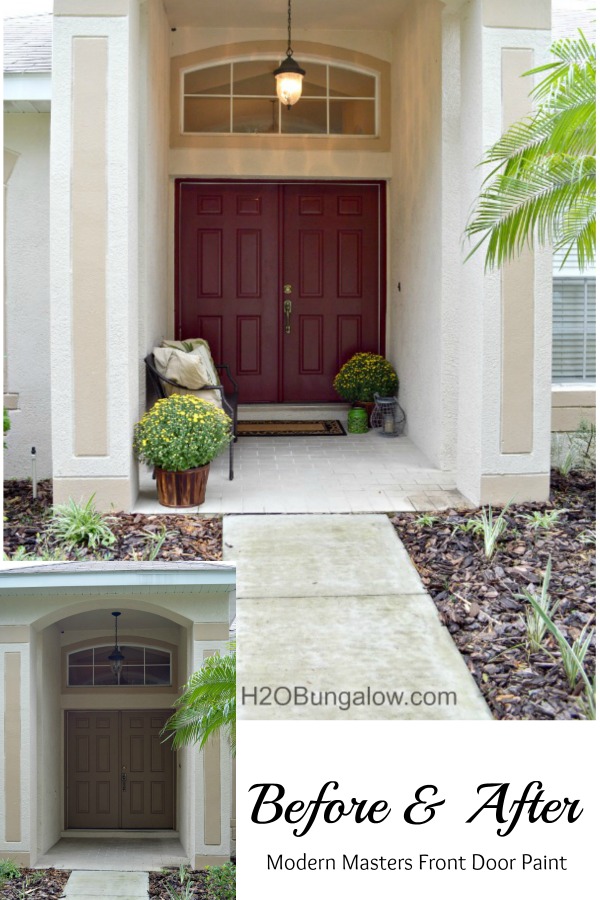
This is what their front door looked like before. The walkway up to the house, front door, and entry had so much potential to stand out. The first big challenge? Everything was brown, brown, and more brown.
There were shades of brown and beige everywhere. It’s a safe color pallet, but it was time to give it some personality with a new front door paint color.
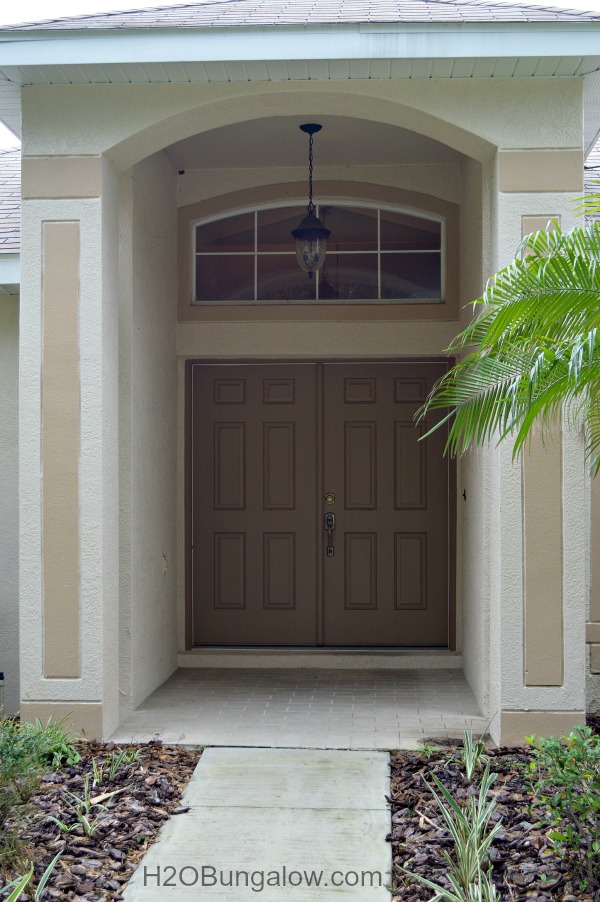
We dramatically updated their entry. Out with the brown and in with the Passionate…literally! We used the color Passionate from the Modern Masters Front Door Paint Collection.
This post contains affiliate links, as an Amazon affiliate I earn a fee from qualifying purchases at no additional cost to you. Thank you for supporting H2OBungalow!
Supplies needed to paint your front door
Step 1. Prepare your surface
Before painting your front door, make sure you’re painting over latex paint. If you’re not sure, test this by rubbing a rag dipped in rubbing alcohol on your door.
If some paint comes off, your paint is latex. If not you’ll need to prime your door first. You can find a primer at your local Home Depot, Lowes, or a paint store.
If you are painting over latex, start with a good cleaning. I use TSP (Trisodium Phosphate) to degloss and clean pretty much everything I paint. We thoroughly wiped the doors and all the ledges and grooves with TSP.
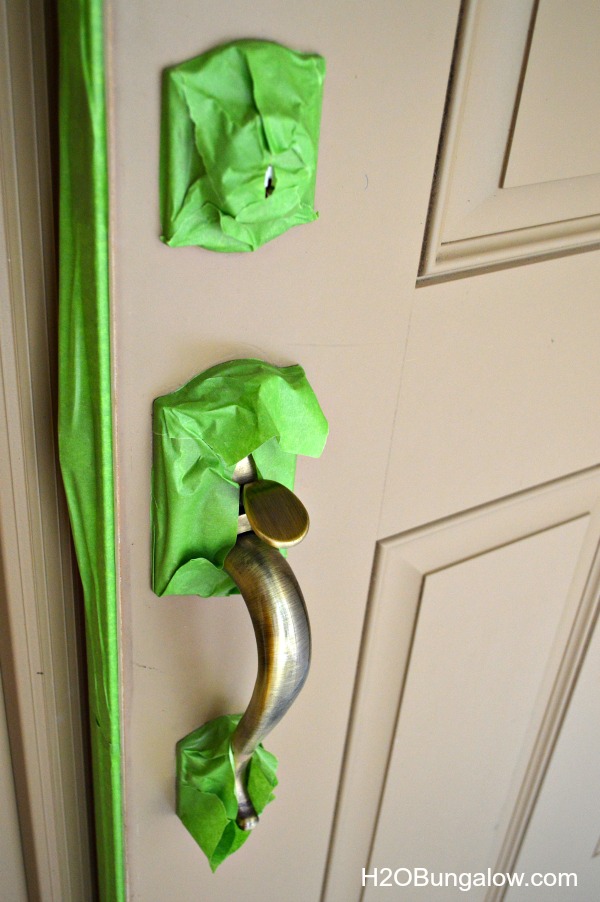
Ideally, we’d take off the doors and paint this on a level surface. We didn’t have the time for ideal and the Florida heat was brutal so we couldn’t take off the doors and let all the AC out.
Instead, I used Frog tape to carefully tape off the edges and hardware. After laying the tape, run your fingers over the edges gently but firmly to make sure you have a good seal.
This will help you get a crisp edge. You’ll find more very useful painter’s tape tips in my 12 Genius Painters Tape Tips for a Perfect DIY Project.
Step 2. Paint
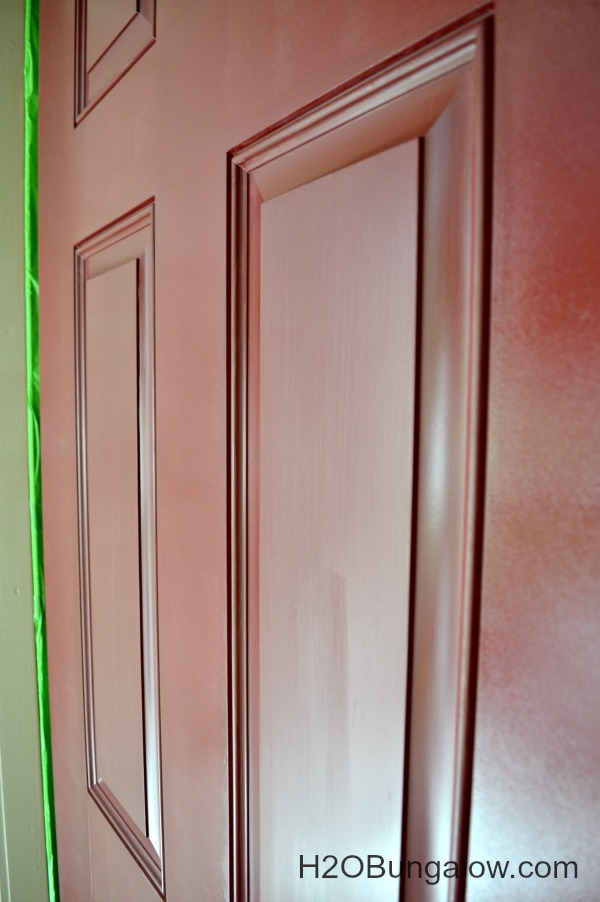
Start painting with your paintbrush on the inner panels. Only dip about 1/3 of your brush into the paint, wipe off the excess and paint a thin layer.
I paint in the same direction and watch the corners for drips. I like to quickly paint this area and then go back over it to smooth it and even out the coverage.
Here’s one of my favorite painting tips! Rub a generous amount of hand lotion on your hands before painting to make cleanup a breeze. Paint washes right off and won’t stick to your skin!
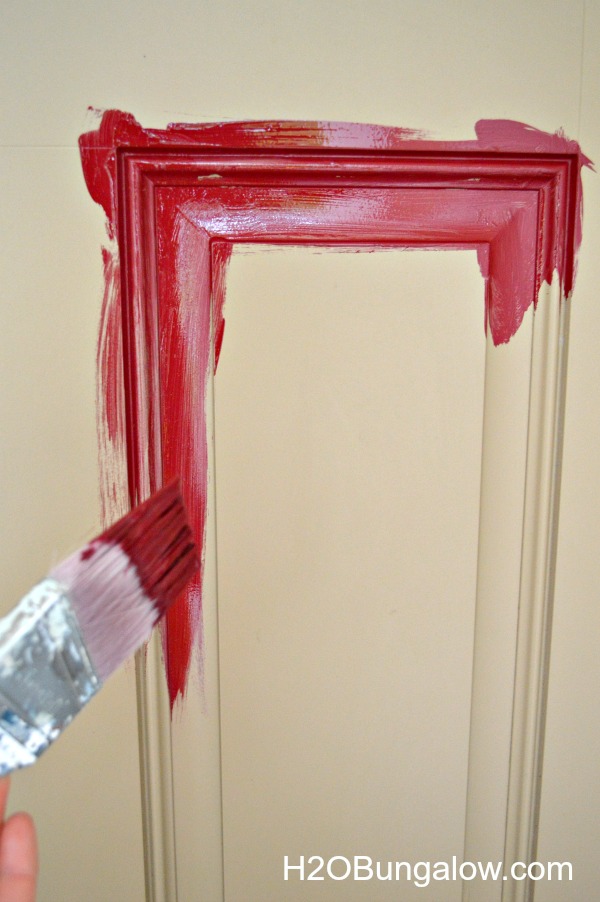
Next, you’ll use a foam roller to paint the center raised panel, again in a thin layer from top to bottom. Follow this step for all the door panels and always paint in the same direction, top to bottom.
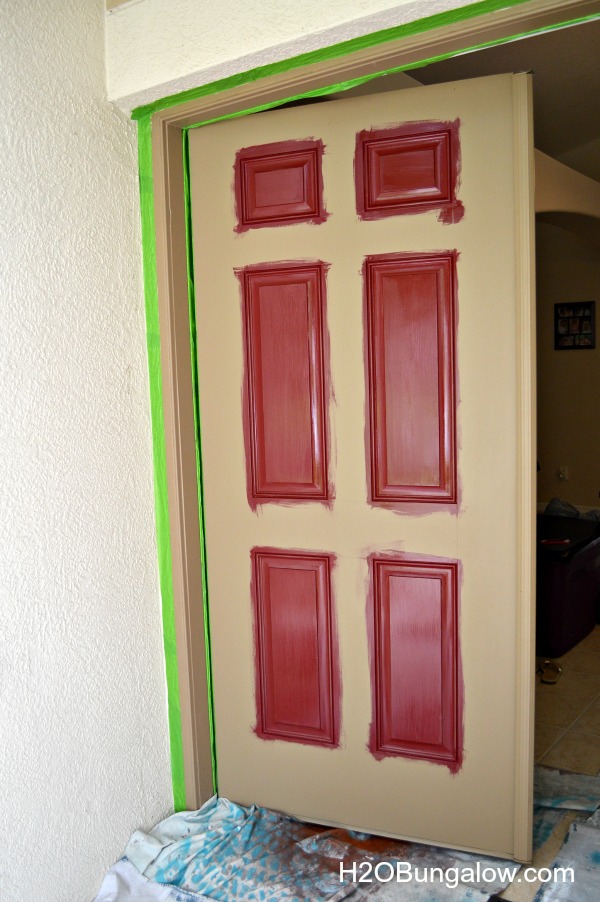
Once the panels are painted, paint the rest of the flat surface on the door with the roller and then trim the outer edges of the molding and door.
Take the roller and go back over any flat area where there are brush strokes. The reason I like painting a door in this order is I’m working with wet surfaces and they blend well.
This is a good time to mention to recheck your corners often and be sure you don’t have drips or pooling of paint. They are easy to wipe up with your brush as long as the paint is still wet.
Using good quality paint makes a huge difference. I immediately noticed how the paint smoothed out and helped keep my brush strokes at a minimum and the coverage was incredible!
Two very thin coats were all it took to cover these two big doors. I didn’t come close to using all the paint either!
Step 3. Let your paint dry
Start on your second coat as soon as your first coat is dry to the touch. Then, while your paint is still wet, carefully take off the painter’s tape.
Give your paint several hours to finish drying. It’s best not to have any freshly painted surface come in contact with another surface. We left the doors slightly open.
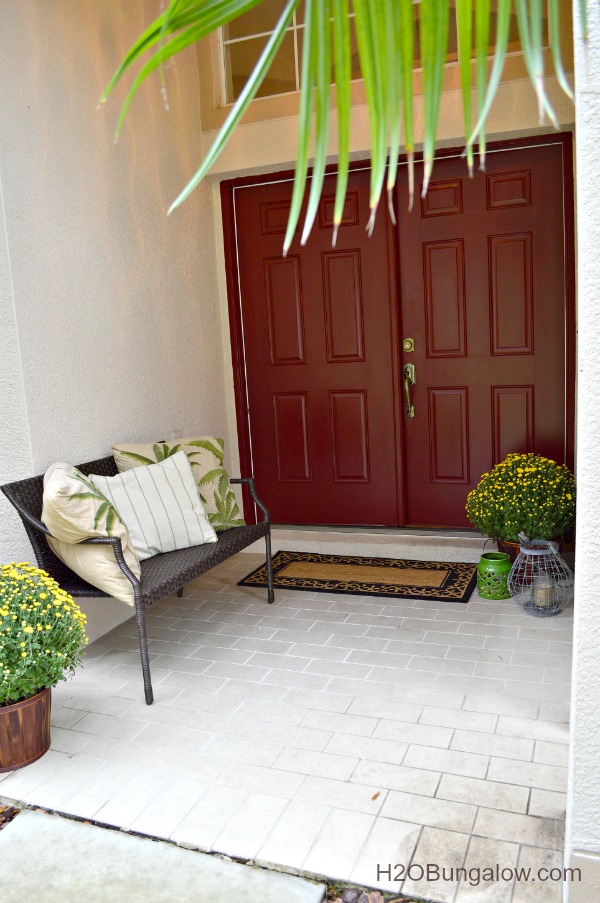
Next, we accessorized. I shopped their house and found a few pillows and awesome decor items. We also added a new doormat and a few colorful yellow mums which brightened up the entry.
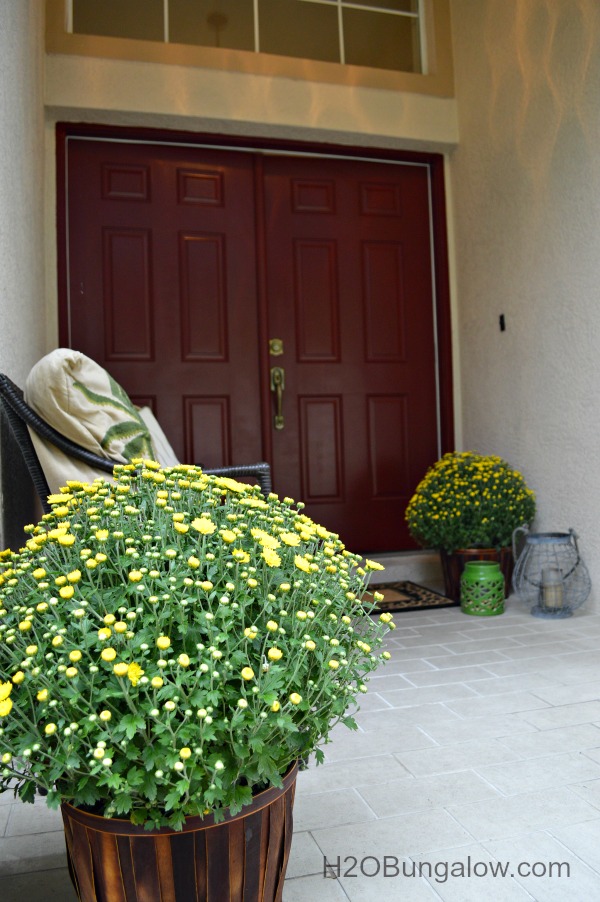
The entry is now welcoming with a lovely front door color that pops with personality!
Painting a drab or faded front door is such an easy way to dramatically update an entryway and boost your curb appeal.
Take a look at the lovely colors available from the Front Door Paint line to find one that suits your home and personality. In addition to being a superior quality paint, they are guaranteed not to fade! The gorgeous red I used is Passionate.
If you loved this front door, you’ll love my other Modern Masters paint projects like my How To Faux Paint A Copper Front Door and my Mailbox Makeover with Metal Effects.